Installing Ruby 2.1 and Twitter API gems on Stanford Farmshare
This is strictly a housekeeping-chore that we're doing, so that we have access to a couple of highly useful command-line programs to access Twitter. Ruby is a programming language, and the the programs we want to use – t and twurl, happen to be written in them.
Ruby is already installed on corn.stanford.edu, but we need to install our own version so that we have the freedom to install these written-in-Ruby programs of our own choice, hence, the steps involving something called https://github.com/sstephenson/rbenv.
But we will not be writing Ruby code. Whether you do or don't know Ruby makes no difference, just follow the steps below to get the necessary version of Ruby on your system (these steps should work on personal OS X/Linux laptops as well).
Installing rbenv
Log into corn.stanford.edu.
Are you a Stanford student who enrolled pre-2014 and is your Stanford FarmShare account not on bash yet? Then execute bash – at some point, you should contact Stanford IT to have them switch you over to bash by default so you don't have to keep typing bash as soon as you log in.
Run these commands, which will change your PATH environment to point to the correct Ruby binary:
git clone https://github.com/sstephenson/rbenv.git ~/.rbenv
# You'll see the usual output that you get when trying to clone
# a git repo

# The next two commands alter ~/.bashrc, so again, make sure you're in bash
echo 'export PATH="$HOME/.rbenv/bin:$PATH"' >> ~/.bashrc
echo 'eval "$(rbenv init -)"' >> ~/.bashrc
# This lets those changes take effect
source ~/.bashrc
Then to make sure things have worked up to this point, execute:
type rbenv
You should get something that looks like:
rbenv is a function
rbenv ()
{
    local command;
    command="$1";
## etc. etc.
}
– if not, then please contact me before moving on. This is not something you need to be debugging on your own.
Installing ruby-build
This is a just a helper program that you can install via git clone
git clone https://github.com/sstephenson/ruby-build.git ~/.rbenv/plugins/ruby-build
Installing Ruby 2.1
The following command will take about 10 minutes to complete:
rbenv install 2.1.5
# The output will look similar to this:
# Installing ruby-2.1.5...
# Installed ruby-2.1.5 to /afs/.ir/users/y/o/youthere/.rbenv/versions/2.1.5
Get some coffee, come back. If Ruby is done installing and you see your prompt, run this:
rbenv global 2.1.5
And to make sure everything worked:
which ruby
# /afs/.ir/users/y/o/youthere/.rbenv/shims/ruby
ruby -v
# ruby 2.1.5p273 (2014-11-13 revision 48405) [x86_64-linux]
If you see anything substantially different, or get an error message, please contact me before moving on.
Installing the Twitter-related command-line tools
Now that Ruby is installed – which is something we won't directly be using, we can now install the two Twitter-related command-line tools, twurl and t.
gem install t twurl
rbenv rehash
Create a Twitter App
Visit https://apps.twitter.com/
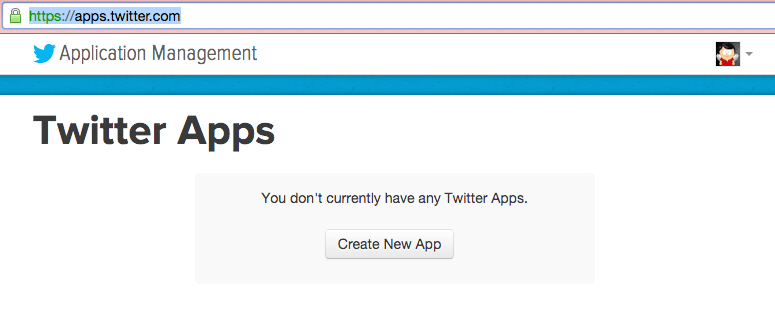
Click Create a New App button
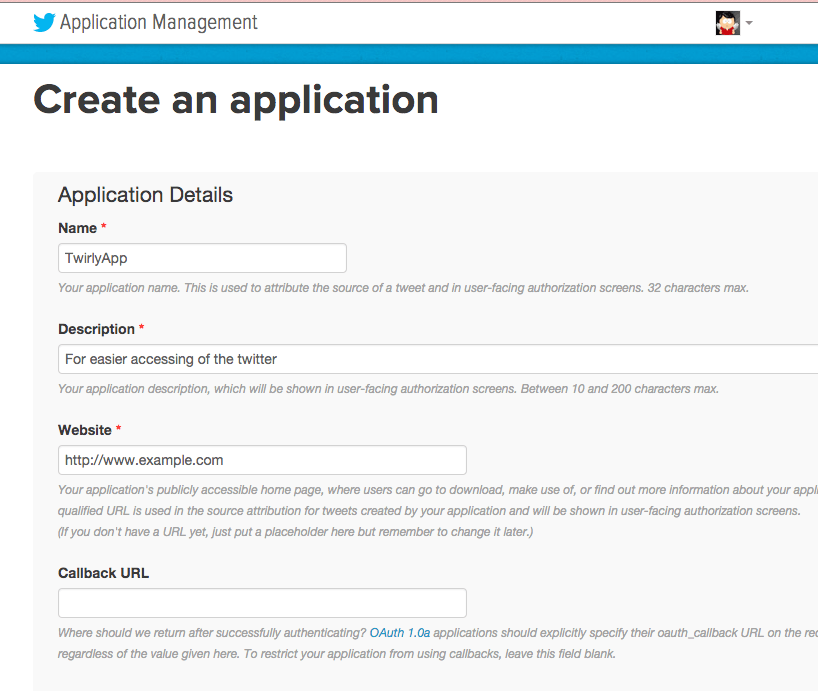
Fill out the fields, scroll to the bottom, read the Developer Agreement agree to them, and then click the Create your Twitter application button.
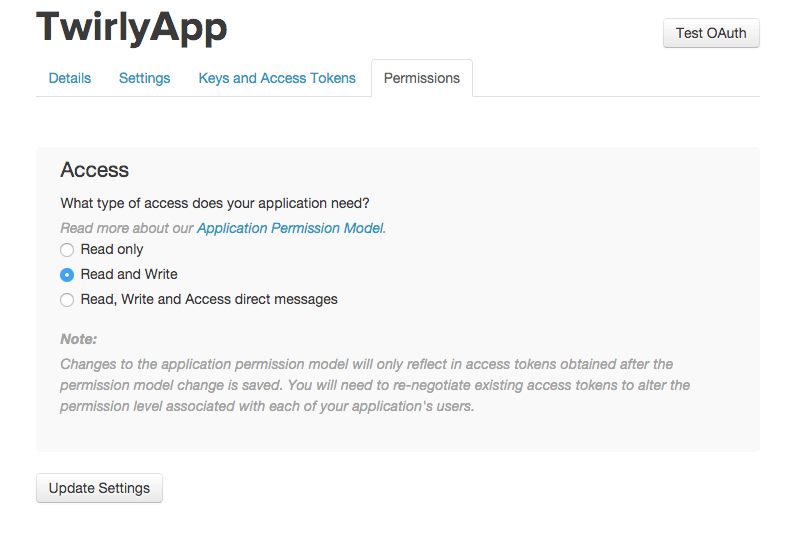
Configuring your app
If you plan to send tweets via the command line, change the Access level to Read and Write
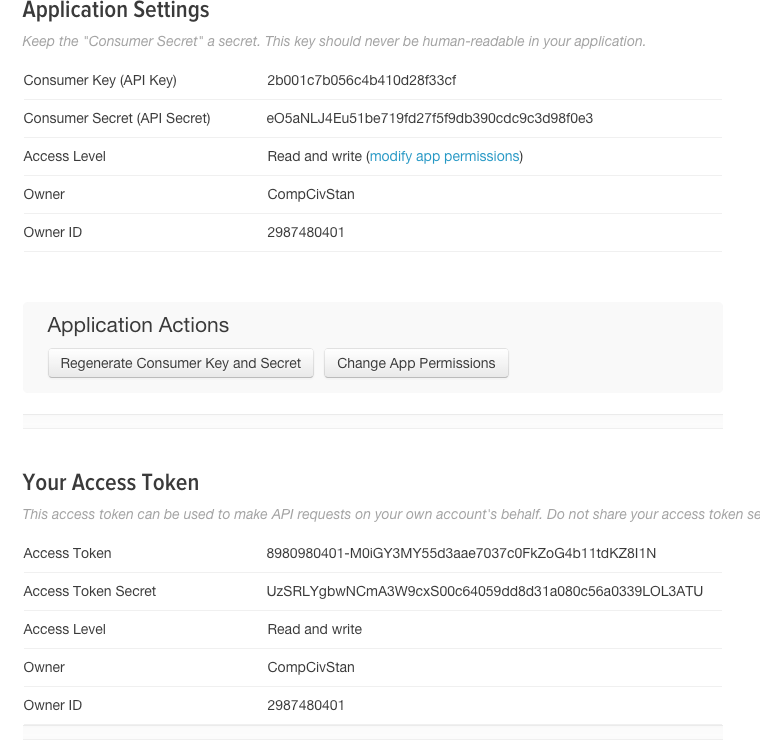
Now click the Keys and Access Tokens tab (near the beginning of the page) and you should see this:
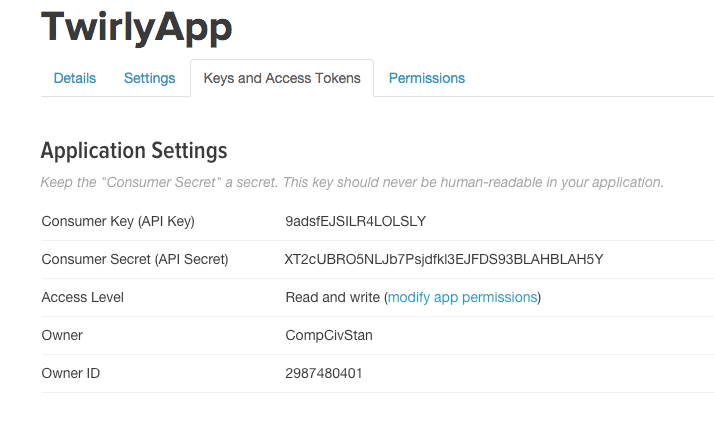
Take note of two of those fields, Consumer Key (API Key) and Consumer Secret (API Secret), which we'll copy later.
Create an access token
Scroll down until you see the subheading, Your Access Token.
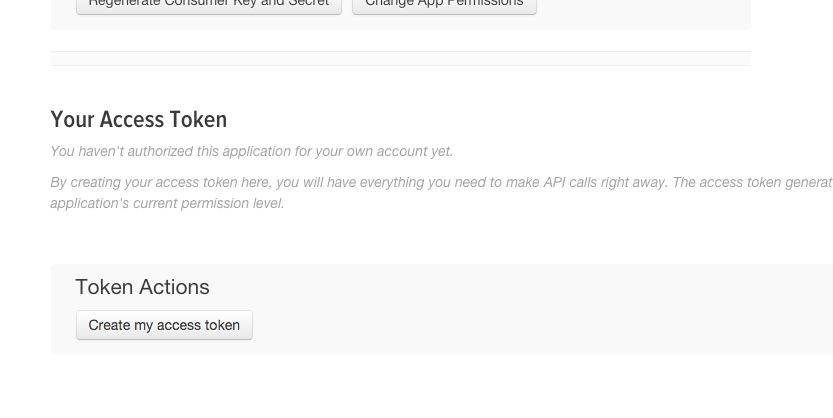
Click the Create my access token button, which should cause a page refresh of the settings page. Below is a screenshot and the highlighted fields that you need to copy for the next step: Consumer Key (API Key), Consumer Secret (API Secret), Access Token, and Access Token Secret
Creating a .trc file
In this next step, we save these Twitter app credentials and tokens onto corn.stanford.edu, so that every time we use either the t or twurl command-line tool, those programs can use the credentials we just created to act on our behalf.
These credentials will live in a file named .trc in the home directory of your corn.stanford.edu account.
Now log into corn.stanford.edu and use nano to create a new file named ~/.trc.
Copy and paste the template below (make sure you keep the indentation consistent) into that ~/.trc file, edit it accordingly; there are nine lines you need to change (they're in all-caps), make sure you've put the values specific to you in those fields or the authentication process won't work.
(it should go without saying that you don't want other people to look at this file)
configuration:
  default_profile:
  - YOUR_USER_NAME
  - YOUR_CONSUMER_KEY
profiles:
  YOUR_USER_NAME:
    YOUR_CONSUMER_KEY:
      username: YOUR_USER_NAME
      consumer_key: YOUR_CONSUMER_KEY
      consumer_secret: YOUR_CONSUMER_SECRET
      token: YOUR_ACCESS_TOKEN
      secret: YOUR_ACCESS_TOKEN_SECRET
Testing out t
Again, the ~/.trc file contains the credentials needed for the t program to act on your behalf on Twitter.
If all went well, run this command:
t whoami
And you should see a response like this:
ID           2987480401
Since        Jan 17 11:57 (35 minutes ago)
Screen name  @CompCivStan
Name         CompCiv Stan
Tweets       0
Favorites    0
Listed       0
Following    40
Followers    1
If you get an error like this:
/afs/.ir/users/d/u/dun/.rbenv/versions/2.1.5/bin/t: Unable to verify your credentials
Then re-open your ~/.trc file and make sure you've put in the right values, as you see them from your Twitter app's settings and access token.
Once you've confirmed that you can read data with the t program (try: t whois stanford), try seeing if you can write data (you needed to enable write access to the Twitter App you created previously) to Twitter:
t update "Hey everyone, I'm tweeting from the command line"
We'll cover more uses of the t program in the next tutorial, but if you're curious about all the other commands you can execute, check out t's documentation.
Creating a .twurlc file
Again, the ~/.trc config file is for the t program. In contrast, the twurl program uses the same format for its configuration, but in a file named ~/.twurlrc.
So all we need to do is this:
cp ~/.trc ~/.twurlrc
Testing out twurl
So let's be clear: the t and the twurl programs access the same API. So why do we need two different programs?
You probably remember how easy it just was to send a tweet or read someone's profile with t. Here's how to read @Stanford's profile with twurl:
twurl '/1.1/users/show.json?screen_name=Stanford'
And you should get a large piece of JSON dumped to your screen. You can pipe it through the jq tool to get a better look:
twurl '/1.1/users/show.json?screen_name=Stanford' | jq '.'
{
  "id": 18036441,
  "id_str": "18036441",
  "name": "Stanford University",
  "screen_name": "Stanford",
  "location": "Stanford, CA",
  "profile_location": null,
  "description": "Stanford University is one of the world's leading research and teaching institutions. Official Twitter feed by University Communications.",
  "url": "http://t.co/sbT0k8wRez"
  /* and more ... */
}
To send a tweet with twurl:
twurl -d 'status=Now I twirl, twirl...TWURL!!!' '/1.1/statuses/update.json'
Not only will you send a tweet, but twurl, like a good Unix program, will spit out the JSON response that the Twitter API responds with for the endpoint of "/1.1/statuses/update.json"

More fun with t
The t program offers a simplified interface for Twitter's API. For convenience, though, you give up the granularity of the actual API data.
However, for quickie data trivia, t serves quite well:
50 most followed followers of an account
t followers --csv peninsupress | \
  csvfix order -smq -fn 'Followers,Following,Tweets,Screen name' | \
  csvfix sort -smq -rh -f 1:DN | head -n 50